Feb 24, 2026
With the Spring ’26 release, Salesforce officially closed the door on creating new Connected Apps—the sturdy backbone of our complex business ecosystems for years. With rumors circulating that existing apps may reach their end-of-life by late 2026, it’s time to retire our nostalgia and embrace a forward-thinking shift toward OAuth External Client Applications (ECAs).
I am going to help you understand how to navigate these changes by breaking down the "why" and the "how" of this new architecture.
For Client-Managed ECA setups, we’ll follow an UI-based approach.
For Vendor-Managed ECA configurations, we’ll dive into a developer-centric workflow using the Salesforce CLI.
Client-Managed External Client Applications
At the forefront of the new framework is the Client-Managed ECA—also called 'Bring Your Own ECA.' This model is designed for organizations that prioritize security sovereignty. By opting for a Client-Managed setup, your organization becomes the sole owner and dedicated guardian of the configuration. You aren't just managing settings; you are the exclusive protector of the Consumer ID and Secret, ensuring that sensitive access credentials never leave your perimeter. Additionally you need to ensure that secure settings are in place.
Let’s explore how this version can be set up.
As with most Salesforce configurations, setting up an ECA begins from the Salesforce Setup page.
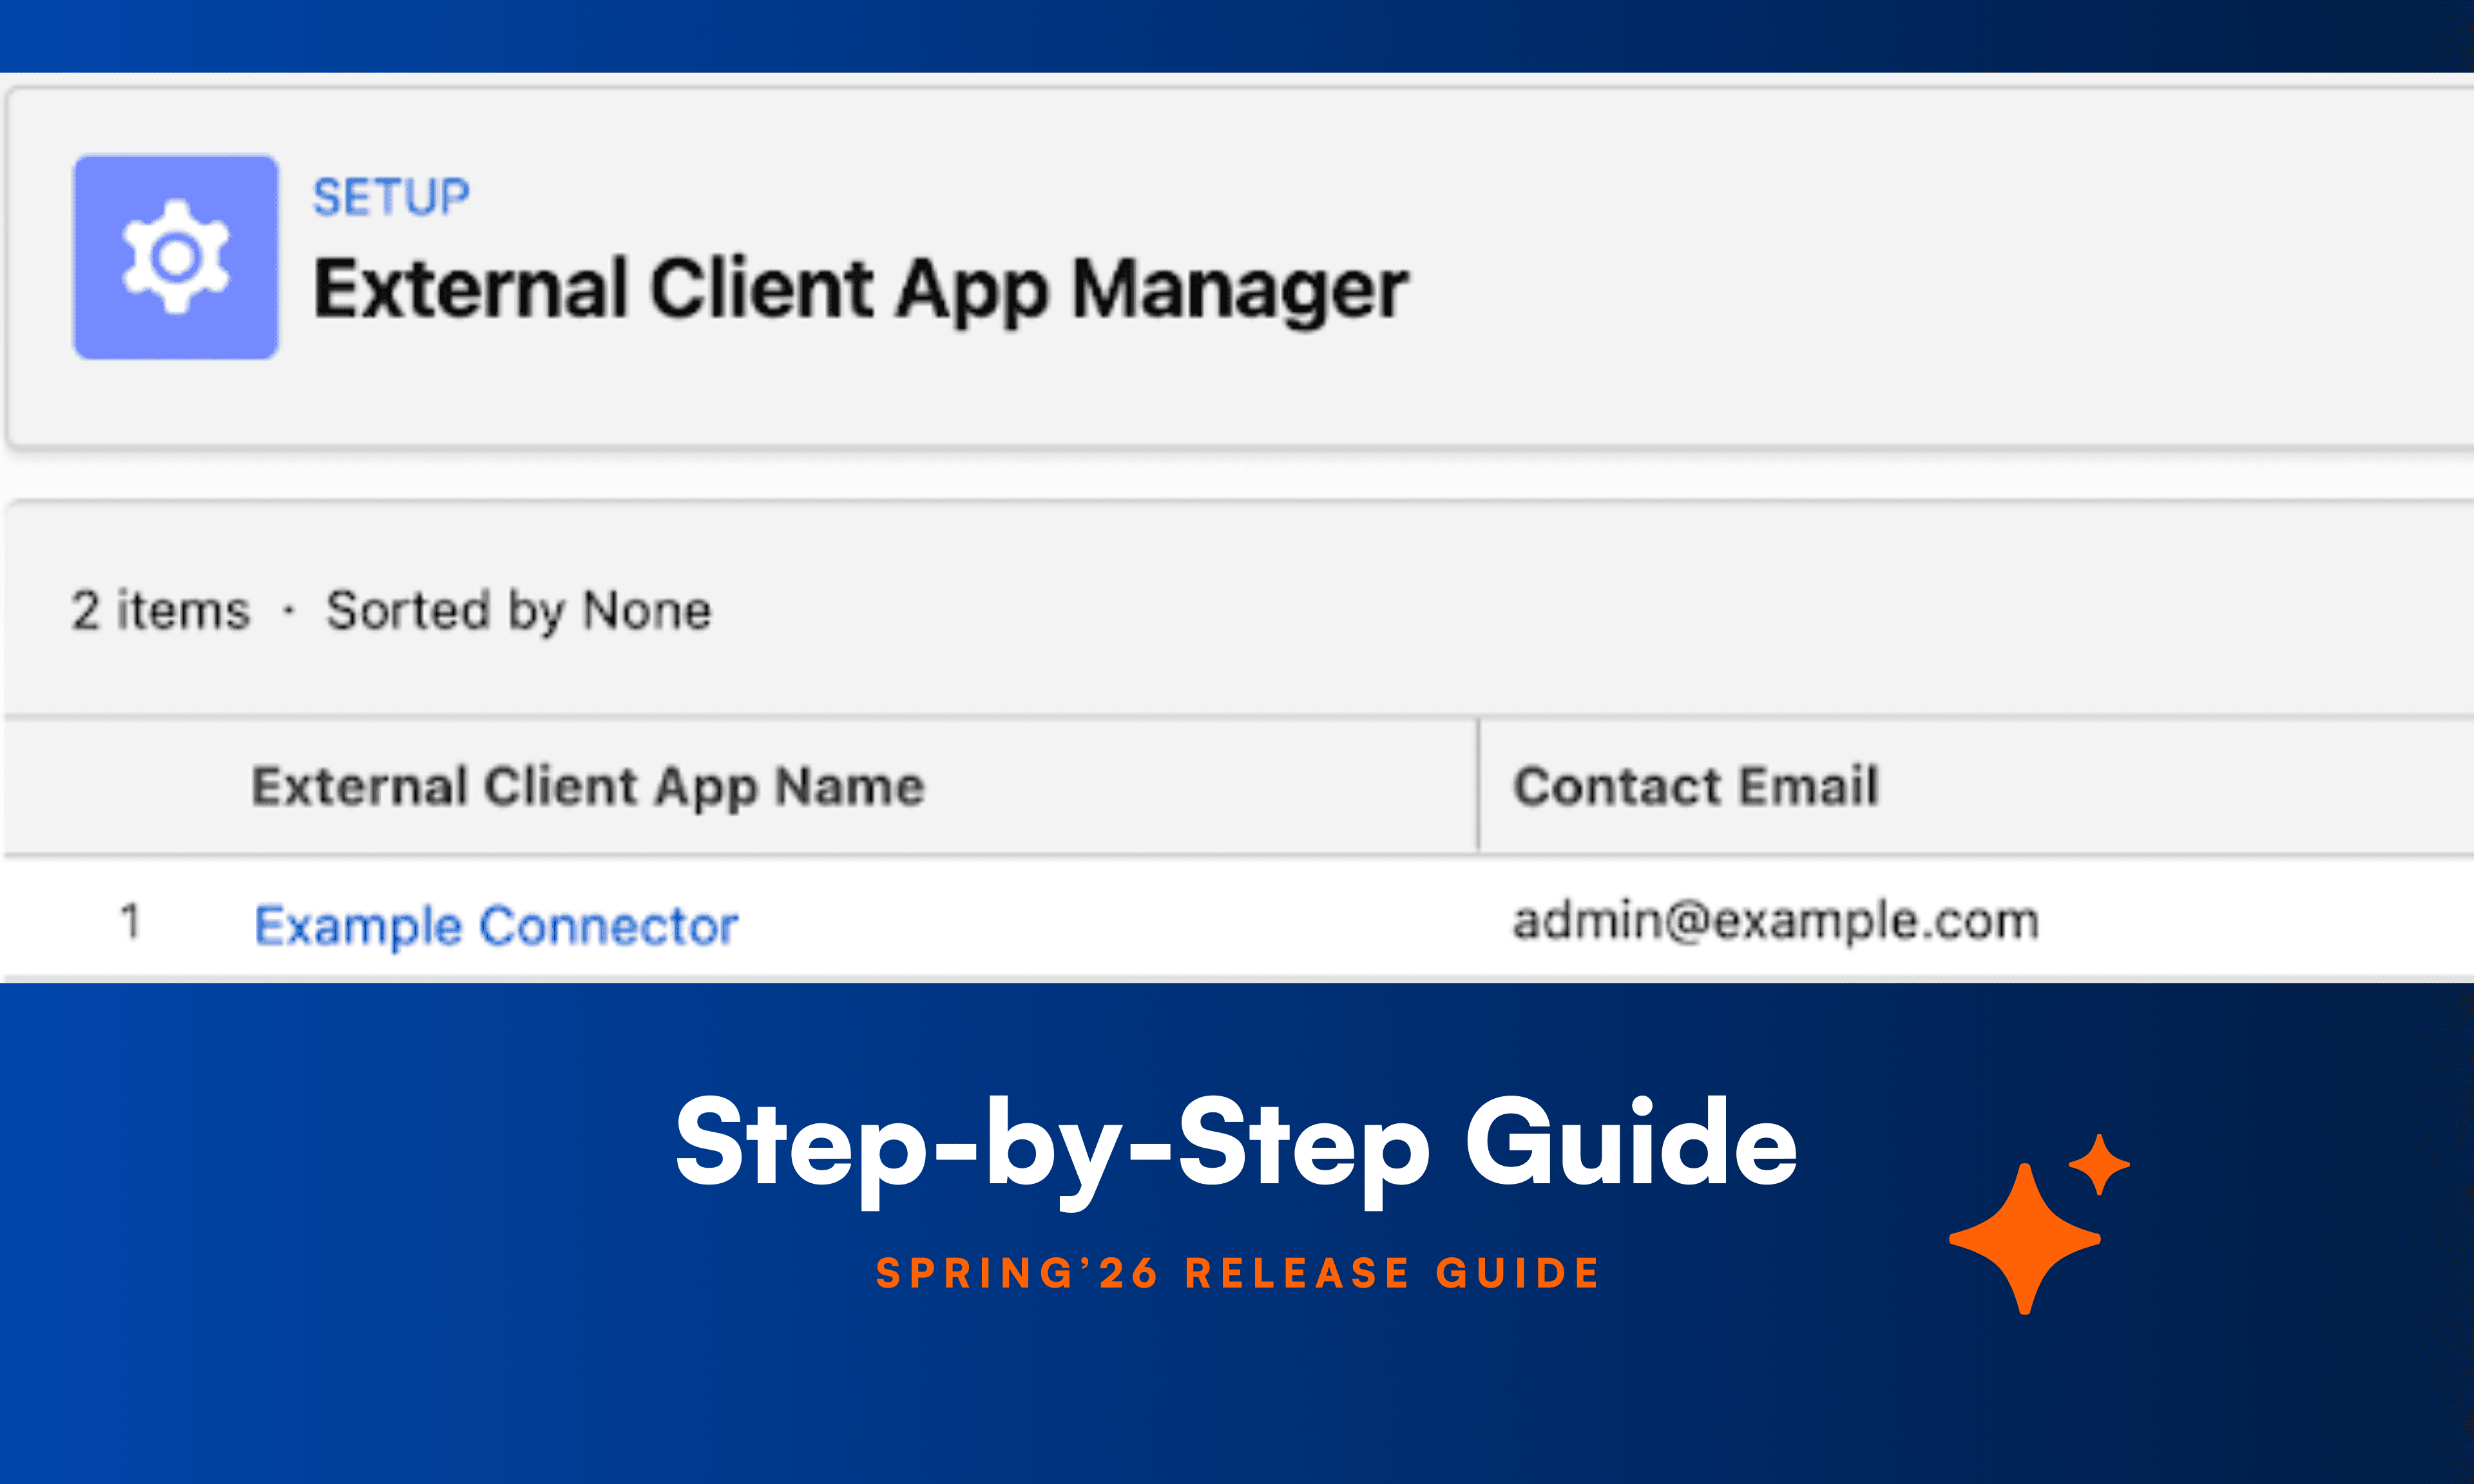
Navigate to Salesforce Setup → Apps → External Client Apps → External Client App Manager

Here you will find the “New External Client App” button. By clicking it you are brought to the ECA settings page.
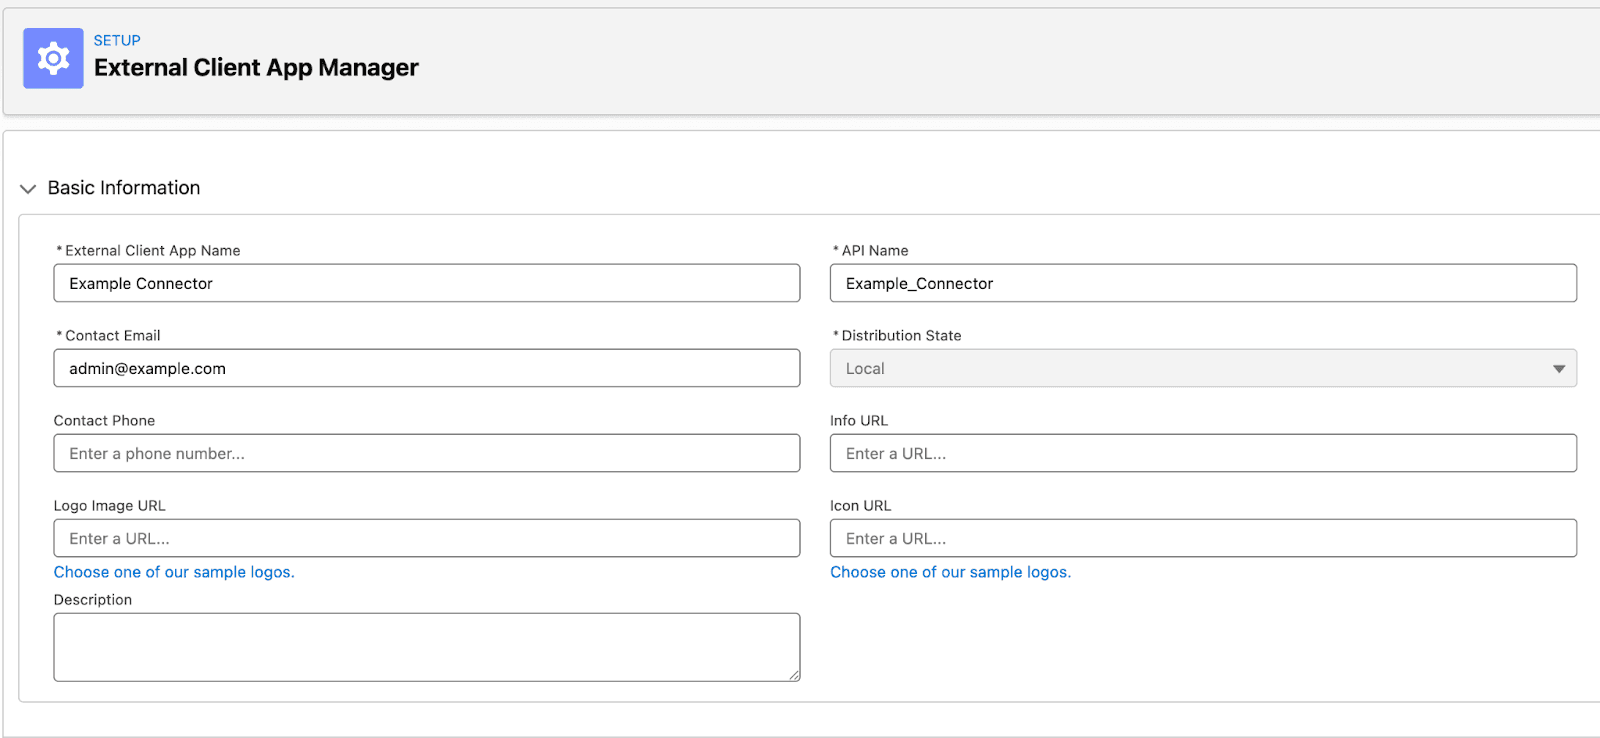
Enter the basic information for your configuration. Since these details are primarily for internal use, you may choose values that best suit your organization; however, we recommend using clear, descriptive names to ensure your team can easily identify the connection. Ensure that you have chosen an unique API Name and that the Distribution State is set as Local.
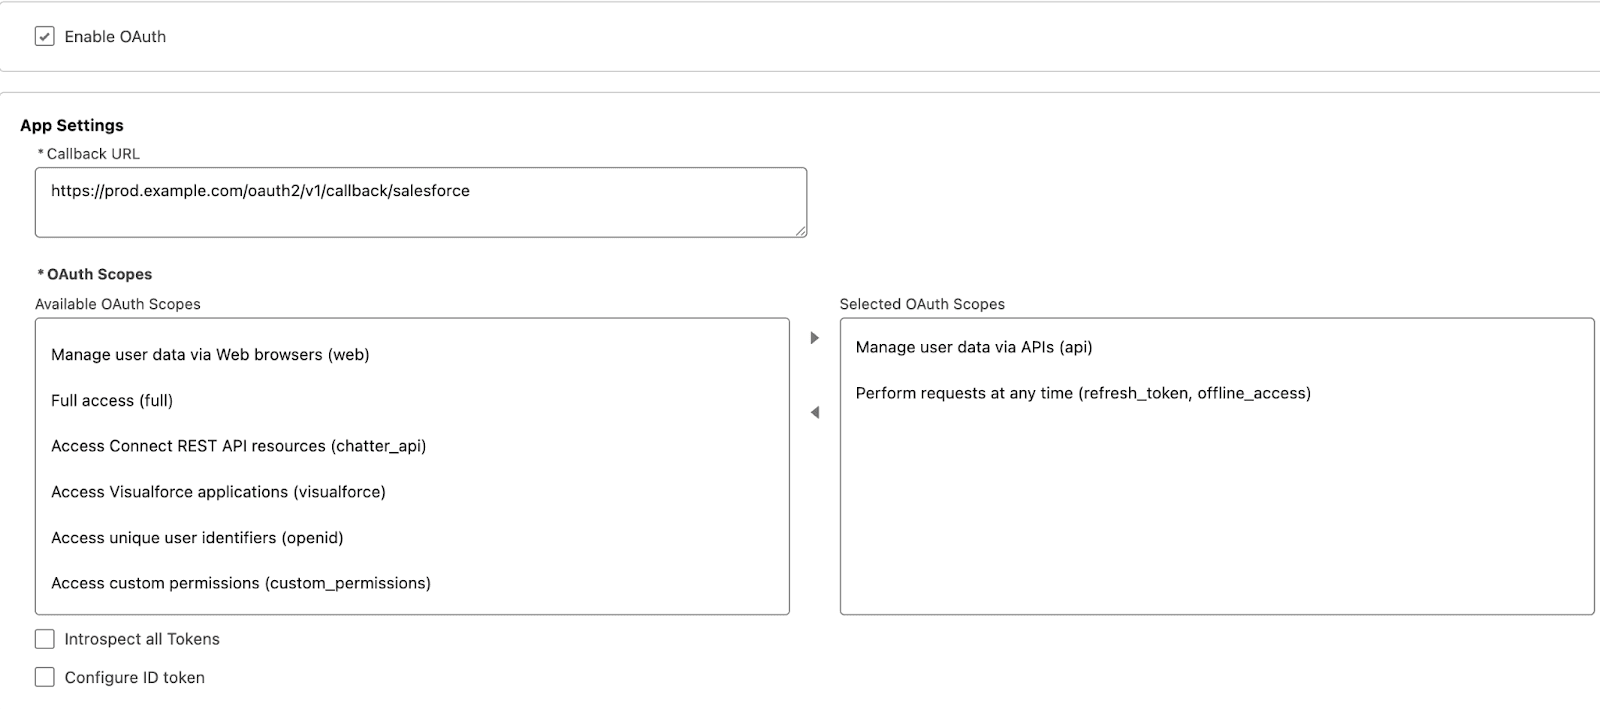
In this section, enable the OAuth settings for your External Client App (ECA). The primary configurations are the Callback URL, which acts as the redirection endpoint after successful authentication, and the OAuth Scopes, which define the app's level of access. Similar to legacy Connected Apps, it is a security best practice to apply the Principle of Least Privilege by selecting only the minimum scopes required for your integration. I'll save the details on the other settings for a future post, but the default values will serve you just fine for now.
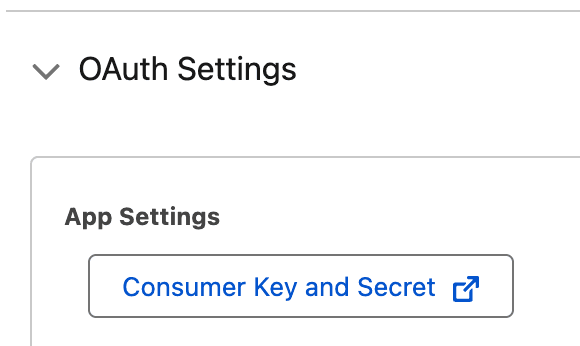
Once your ECA is created and the settings are saved, the option to retrieve your Consumer Key and Secret becomes available. These credentials are the foundation of your OAuth flow, and their protection is paramount. Treat these values with the highest level of security protocol; exposing a Consumer Secret to an attacker is as critical a breach as handing a thief the keys to your front door. Ensure they are stored in a secure vault and never shared in plain text.
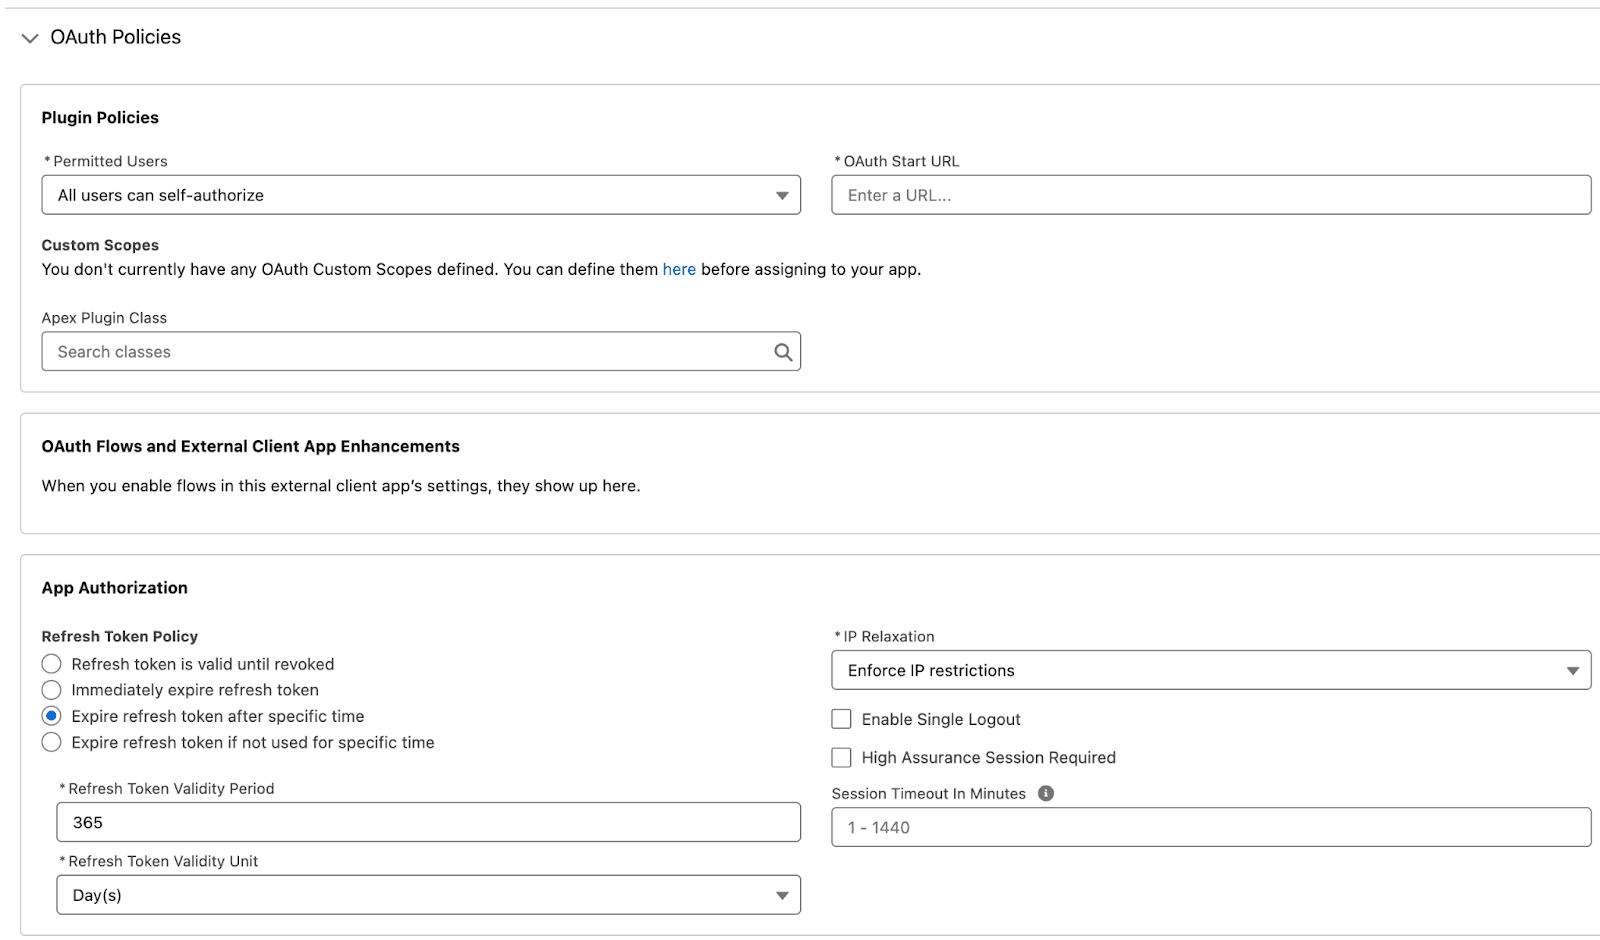
The final step in fortifying your Client-Managed ECA is defining your Policies. From the Policies tab, Salesforce Admins can exert granular control over the integration’s behavior—restricting self-authorization, defining refresh token lifespans, and establishing strict session timeouts. These settings are your primary defense, allowing you to tailor the system’s security posture to your organization's specific risk requirements.
And there you have it. With your Consumer ID and Secret secured and your OAuth scopes precisely defined, your Client-Managed ECA is officially primed for action. Congratulations—you’ve successfully laid a secure foundation for your next-generation integrations.
Vendor-Managed External Client Applications
Vendor-Managed ECAs represent a powerful fusion of second-generation (2GP) packaging and modern ECA flexibility. This model is designed for scale, allowing you to distribute a single Source of Truth from your provider org to multiple external subscriber orgs. It’s important to note that because this process leverages Salesforce packaging features, it cannot be managed through the Salesforce UI alone. In this section, we’ll use the Salesforce CLI to help us with the package distribution methods.


The initial setup for a Vendor-Managed ECA mirrors the Client-Managed process, with exception that we need to configure the Distribution State as Packaged. Using the 'Example Connector', we are no longer just an administrator—we are the Vendor. In this role, we maintain absolute ownership of the configuration and security settings, acting as the sole guardians of the credentials while connecting proprietary services to our customers' environments at scale.
Note: To keep our focus on the unique architecture of ECAs, the following steps assume a baseline familiarity with Apex package development. Rather than retreading the basics of Apex, we’ll dive straight into the specific implementation logic required to power up a Vendor-Managed ECA.
The first phase of the transition involves authorizing your Org via the Salesforce CLI. Once you have authenticated and created a Salesforce project, you need to pull the local source for your ECA. You can retrieve the necessary metadata and configuration files by executing the following command:
sf project retrieve start --metadata ExternalClientApplication:{ECA_API_NAME} --metadata ExtlClntAppOauthSettings:{ECA_API_NAME}_oauth --target-org {TARGET_ORG_ALIAS}
This creates the following files in your project directory:
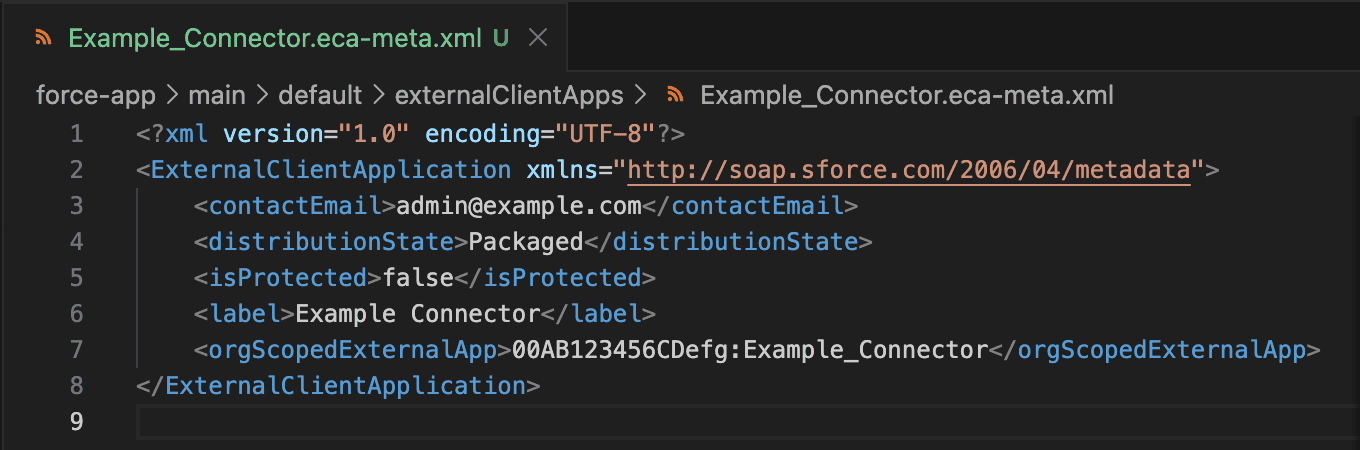
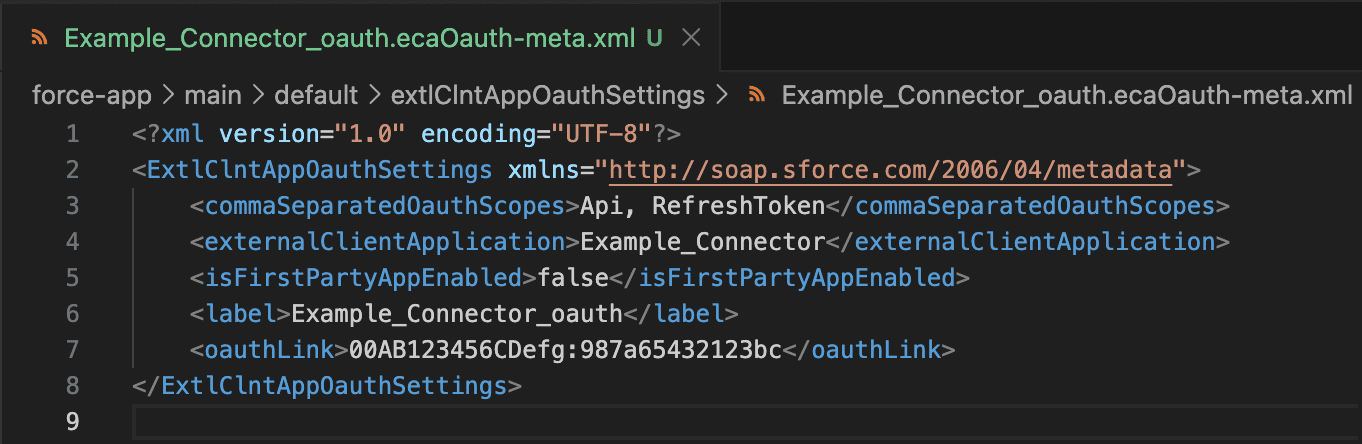
As illustrated, the first file defines the core ECA metadata, while the second manages the OAuth plugin configurations. Take note of the <orgScopedExternalApp> and <oauthLink> fields; both contain a unique ID referencing the Salesforce Developer Hub (Dev Hub) or 'Vendor' org that authored the app. This ID establishes the 'source of truth' for ECA ownership. Furthermore, the <oauthLink> field serves as the functional bridge, linking the OAuth-specific settings back to the primary ECA definition."
In a production environment, Vendor-Managed ECAs are typically encapsulated within a 2GP for secure, scalable distribution. While we won't be covering the full 2GP lifecycle in this post, I will demonstrate the process using a direct metadata deployment to a subscriber org. Please note: Direct deployment is intended for internal testing and demonstration only; for external distribution, 2GP remains the non-negotiable standard for security and version control.
I utilized the following command to execute the manual deployment for this demonstration. It’s important to visualize that this command achieves the exact same architectural result as a Managed Package installation. Note that I used a different org as a target for the deployment.
sf project deploy start --metadata ExternalClientApplication --metadata ExtlClntAppOauthSettings --target-org {SUBSCRIBER_ORG_ALIAS}

Upon navigating to the External Client App Manager in the subscriber org, you’ll find the 'Packaged (Associated)' version of your ECA. While an OAuth connection can now be established, the security architecture has shifted significantly: the Vendor now acts as the sole custodian of the Consumer ID and Secret. This centralized management ensures the subscriber can enjoy a seamless integration without the requirement of managing the credential security. The connection remains inactive until authorized by the subscriber. Valid consumer credentials must be provided to enable vendor access.
And that’s about it. Vendor-Managed ECAs might seem a little daunting if you're unfamiliar with modern Salesforce development concepts, but once you get the hang of the basics, you’ll be deploying and distributing them with confidence.
Core Takeaways
As you have seen, creating ECAs is not rocket science. In reality ECAs work very similarly to the already familiar connected apps. The main difference is that ECAs are deployable as metadata within a managed package.
When choosing the right ECA type for your integration, keep this comparison in mind:
Client-Managed ECAs
Total Sovereignty: You maintain absolute control and responsibility over the configuration settings.
Direct Responsibility: Your organization acts as the primary guardian for all credentials.
Ideal Use Case: Perfect for internal integrations where you want local oversight of the security stack.
Vendor-Managed ECAs
Centralized Authority: The Vendor (source org) defines and manages the core settings.
Delegated Security: The Vendor assumes responsibility for protecting the Consumer ID and Secret.
Ideal Use Case: The gold standard for distributed systems and 2GP packaging, ensuring consistency across subscriber orgs.
About Tiusanen
Tiusanen serves as the primary Salesforce Developer and Data Analyst at Valo. He is passionate about the intersection of data and development, currently channeling his energy into mastering Apex and modern integration frameworks. Tiusanen believes in constant motion—both in his career and his personal life—frequently spending his time away from the screen jogging or diving into a new subject to learn.

Antti Tiusanen
Recommended

How Resonate Uncovered "Invisible" Salesforce Risks and Mastered Salesforce Security
Why the leader in consumer intelligence chose Valo as their dedicated Event Monitoring solution for immediate visibility and ROI.
Fatiqa Nadeem
Untangling The Web Part 2: Scattered Spider and ShinyHunters’s Summer Targeting Salesforce Ecosystems
Josh Aberant
Best Practices for Salesforce API Integrations: Stop Using Username-Password Flow
How to avoid security risks introduced by particular OAuth Flows
Mika Ståhlberg


